When designing your tabulation, you can use the Interaction Manager to indicate which slicers should affect which discovery areas. The Interaction Manager opens at the bottom of your canvas. You can use it, for example, to link a Year slicer to Sales data from a discovery area by selecting the checkbox between them. This action specifies which data should be filtered by the selected slicer.
You can use the Interaction Manager to add, remove, and edit interactions, and to edit your slicer settings or delete your slicers from the tabulation. You cannot create a new slicer from the Interaction Manager.
Tip: If you have not added a discovery area or slicer to your worksheet yet, you should do so before you proceed. For more information, see Slicers and Drag discoveries into Tabulate Pro.
Opening the Interaction Manager
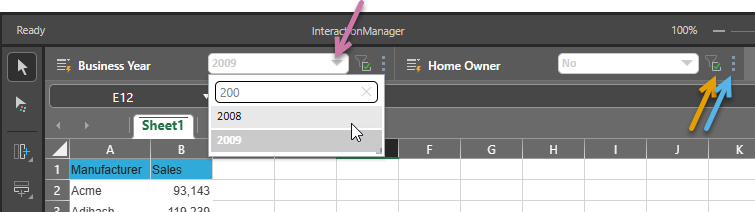
The Interaction Manager opens when you click the Interaction Manager button in the Advanced Settings ribbon (purple highlight below):

Editing your interactions
Use the interaction manager to specify which slicers affect which discovery areas:
Add and remove interactions
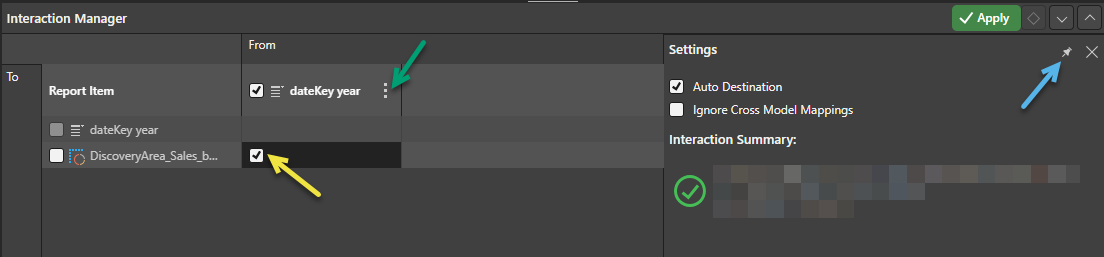
Interactions can be added or deleted by selecting or clearing the relevant checkboxes:
- When the checkbox is selected (yellow arrow above), there is an interaction between the slicer in the From column and the discovery area in the To row.
- When the checkbox is clear, there is no interaction between the slicer and the discovery area.
Settings
When a cell representing an interaction is selected in the Interaction Manager, the Settings panel opens:
- Clear the Auto Destination checkbox to disable the interaction. This causes the interaction to be ignored.
- Select the Ignore Cross Model Mappings checkbox if you don't want cross-model mappings to be used where there is a cross-model interaction that is not supported out of the box. For more information, see Cross Model Mapping in Tabulate.
Tip: You can pin the Settings panel in the Interaction Manager to keep it open while you work. Click the Pin icon (blue arrow above) in the header to pin the panel. The panel will remain open until you unpin it.
Context Menu
Click the Ellipse icon in the header row to open the slicer's context menu (green arrow above).
Slicer Settings
Update the Settings associated with a slicer. You can edit the slicer settings in the Slicer Settings panel, changing the slicer's title, slicer type, or configuring its elements list as needed.
- Click here for more information about Slicer Settings from Discover Pro
Delete Slicer
Delete the slicer from the tabulation and remove the interaction.
Related information
In Tabulate, slicers that are associated with your tabulation are displayed at the top of the worksheet:
- Click here for information about creating and configuring slicers